Tech-Docs
Template Document Generation using Adobe Document Generation API
Table of Contents
- Template Document Generation using Adobe Document Generation API
- Table of Contents
- Steps to Generate Token, Upload File, Generate Document (DOCX or PDF), and Retrieve Output
- 1. Create a Document Template
- 2. Prepare Your JSON Data
- 3. Get API Key from Adobe Developer Console
- 4. Generate Token
- 5. Get Upload Presigned URI
- 6. Upload File
- 7. Document Generation (DOCX or PDF)
- 8. Poll the Document Generation Periodically check the status of your document generation job using Adobe’s API until it’s completed
- 9. Get the Output File
Steps to Generate Token, Upload File, Generate Document (DOCX or PDF), and Retrieve Output
1. Create a Document Template
Use Microsoft Word to create a document template. Add template tags to indicate where dynamic content will be inserted. For example:
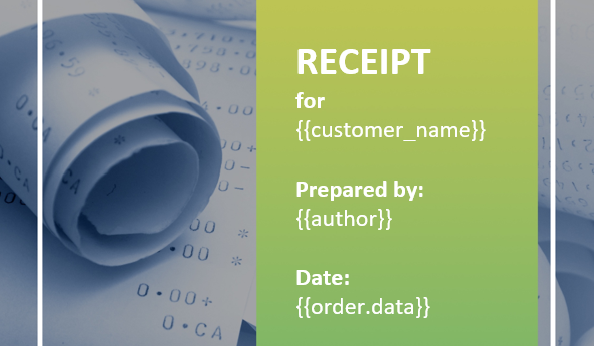
Figure 1: Example of a document template in Microsoft Word with template tags.
2. Prepare Your JSON Data
Create a JSON file with the data that will replace the template tags. Ensure the JSON structure matches the template tags. For example:
{
  "customer_name": "Rajesh Kumar",
  "product": {
    "name": "Mystery Novel",
    "price": "399.00"
  },
  "order": {
    "number": "789012",
    "date": "2024-12-04",
    "delivery_date": "2024-12-10"
  },
  "company": {
    "name": "BookVista Publishers",
    "address": {
      "street": "123 Book Street",
      "city": "Mumbai",
      "zip": "400001"
    }
  },
  "author": "Anita Desai"
}
3. Get API Key from Adobe Developer Console
To interact with the Adobe Document Generation API, you need to obtain an API key from the Adobe Developer Console. Follow these steps:
- Sign in to Adobe Developer Console: Go to the Adobe Developer Console and sign in with your Adobe ID.
- Create a New Project: Click on “Create New Project” and give your project a name.
- Add an API: Select “Add API” and choose “Document Generation API” from the list.
- Generate API Key: Follow the instructions to generate an API key. Note down the
client_idandclient_secretas you will need these for authentication.
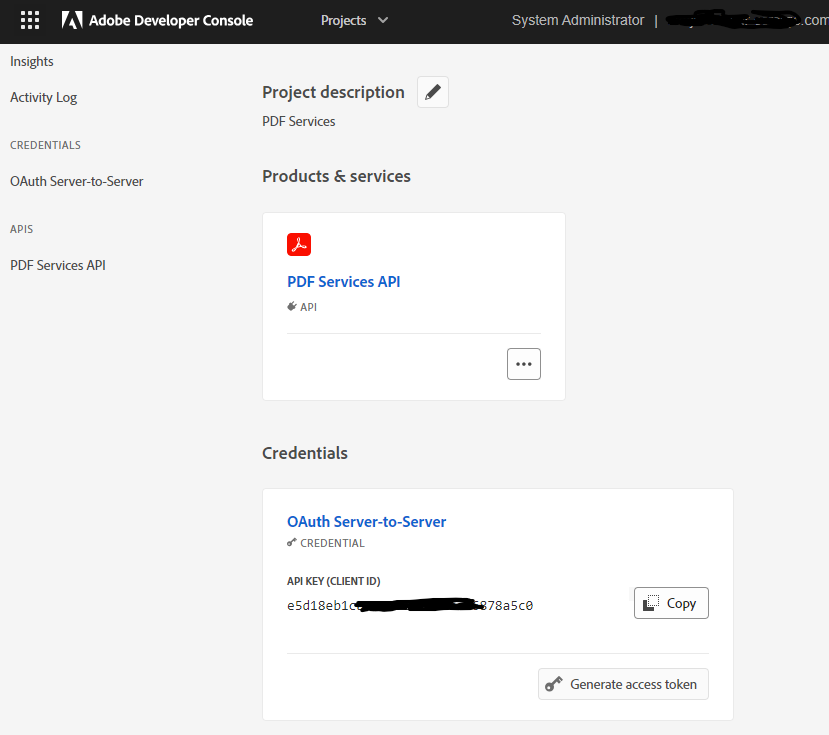
Figure 3: Steps to obtain an API key from the Adobe Developer Console.
4. Generate Token
Use Adobe’s Identity Management Service (IMS) to generate an access token.
Endpoint: https://ims-na1.adobelogin.com/ims/token
Request:
- Method:
POST - Headers:
Content-Type:application/x-www-form-urlencodedclient_id=<YOUR_CLIENT_ID>client_secret=<YOUR_CLIENT_SECRET>grant_type=client_credentials
Response:
-
Status: 200 OK
{
  "access_token": "<ACCESS_TOKEN>",
  "token_type": "bearer",
  "expires_in": 86399
}
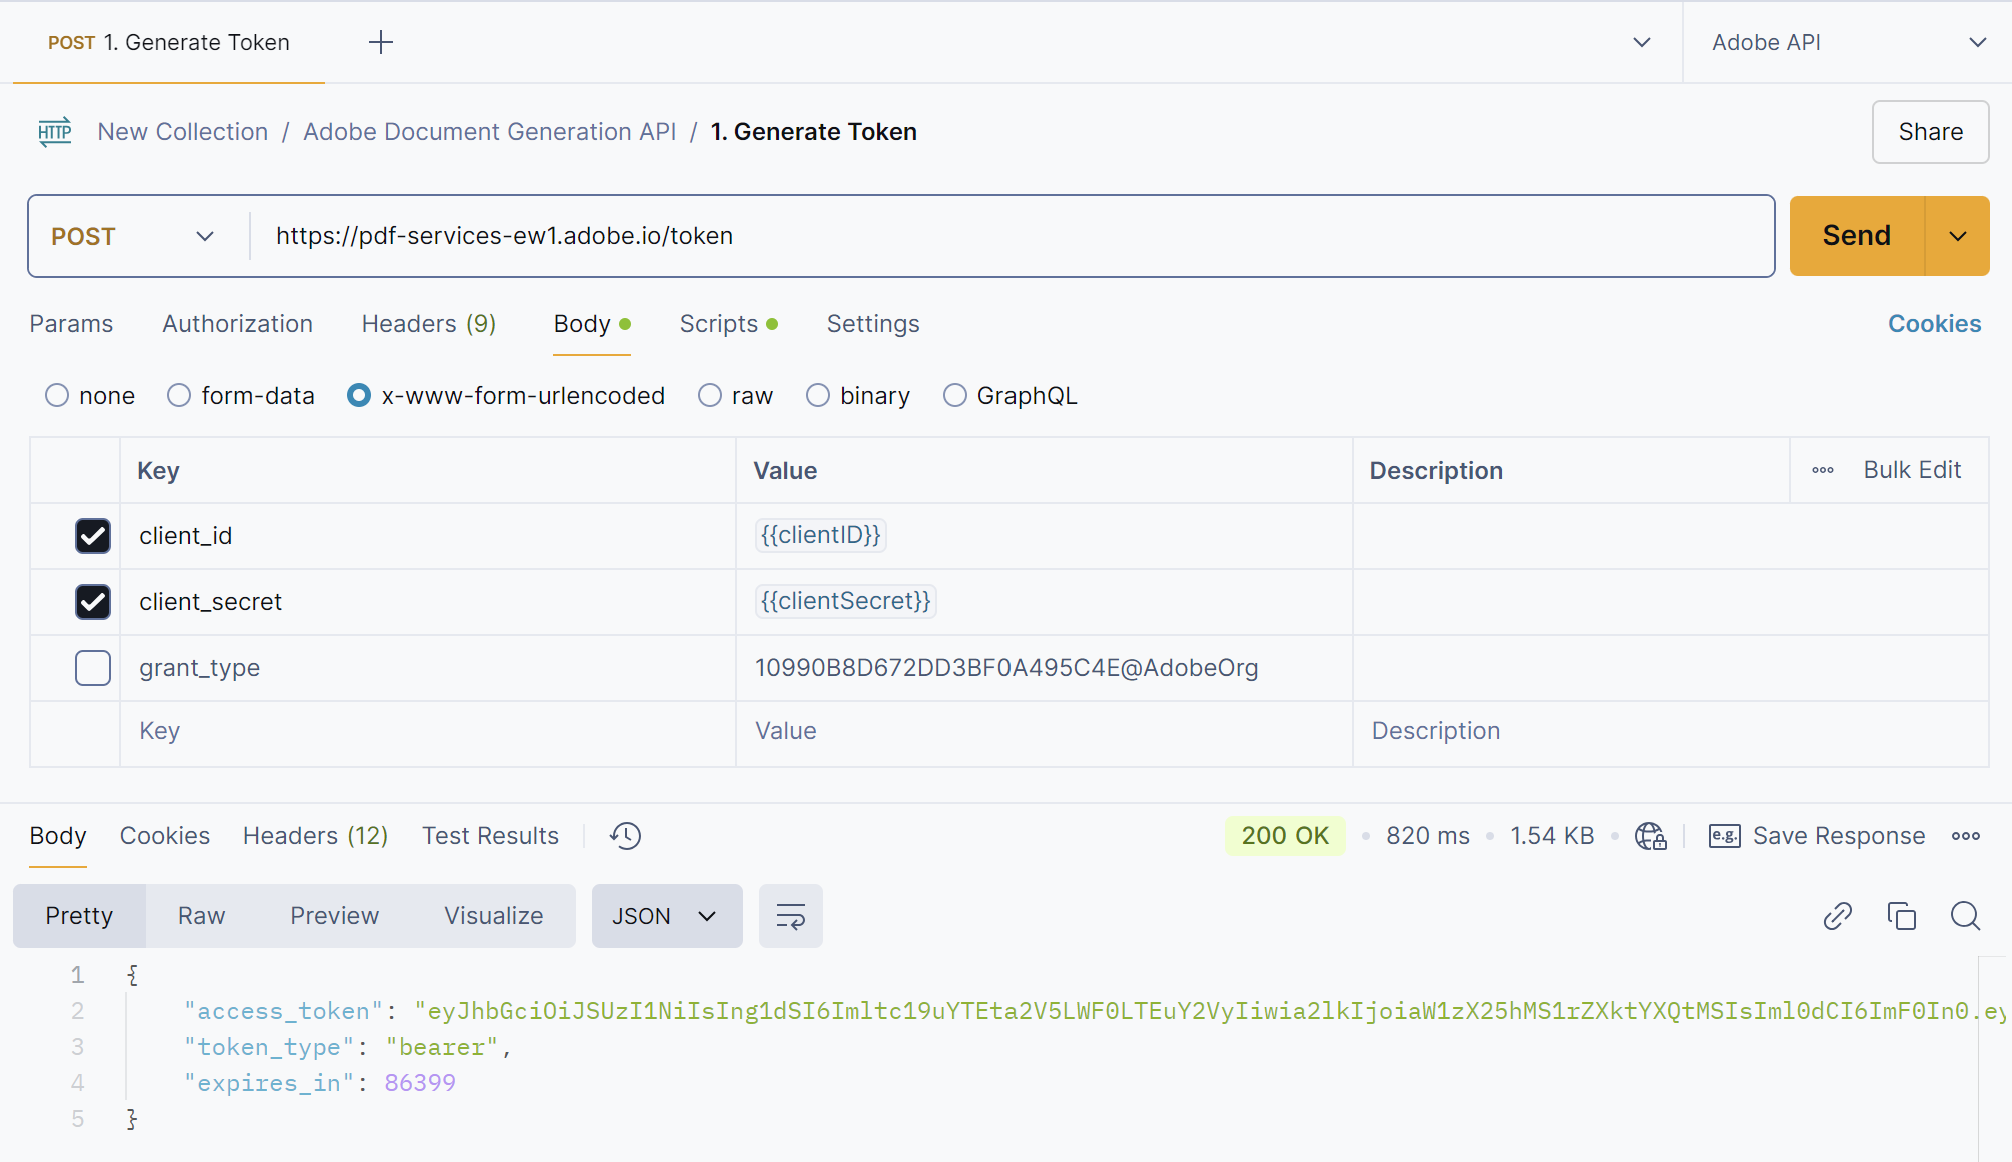
Figure 4: Generating an access token using Postman.
5. Get Upload Presigned URI
Get a pre-signed URL for uploading your file to Adobe’s cloud storage.
Endpoint: https://pdf-services.adobe.io/assets
Request:
- Method:
POST - Headers:
Authorization:Bearer <ACCESS_TOKEN>Content-Type:application/json
-
Body for DOCX (Raw JSON)
{ "mediaType": "application/vnd.openxmlformats-officedocument.wordprocessingml.document" } -
Body for PDF (Raw JSON)
{
  "mediaType": "application/pdf"
}
Response:
-
Status: 200 OK
{
  "upload_uri": "<UPLOAD_URI>",
  "asset_id": "<ASSET_ID>"
}
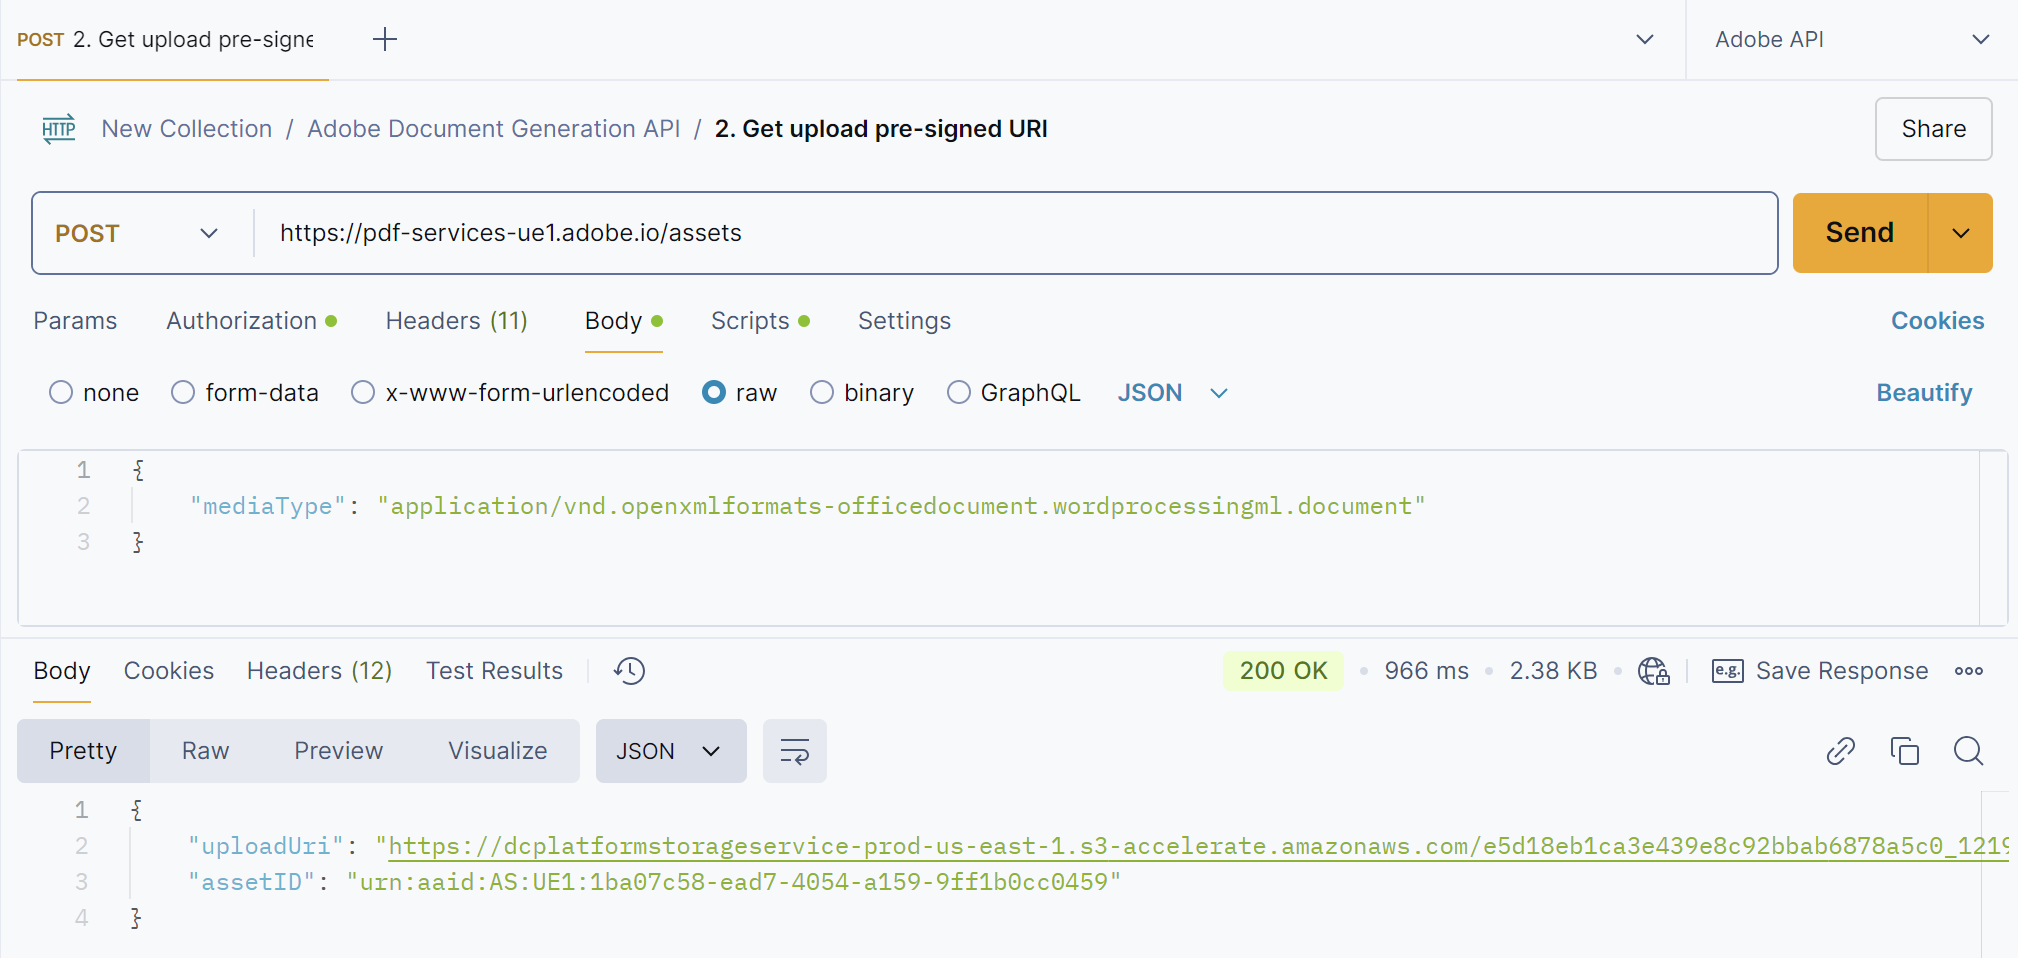
Figure 5: Requesting a presigned URI for file upload using Postman.
6. Upload File
Use the pre-signed URL to upload your file to Adobe’s cloud storage.
Request:
- Method:
PUT - Body:
- The body should contain the raw binary content of the file you are uploading.
Example:
PUT <UPLOAD_URI> HTTP/1.1
Host: <UPLOAD_HOST>

<FILE_CONTENT>
Response:
-
Status: 200 OK
{ "status": "success" }- Body: The binary file content.
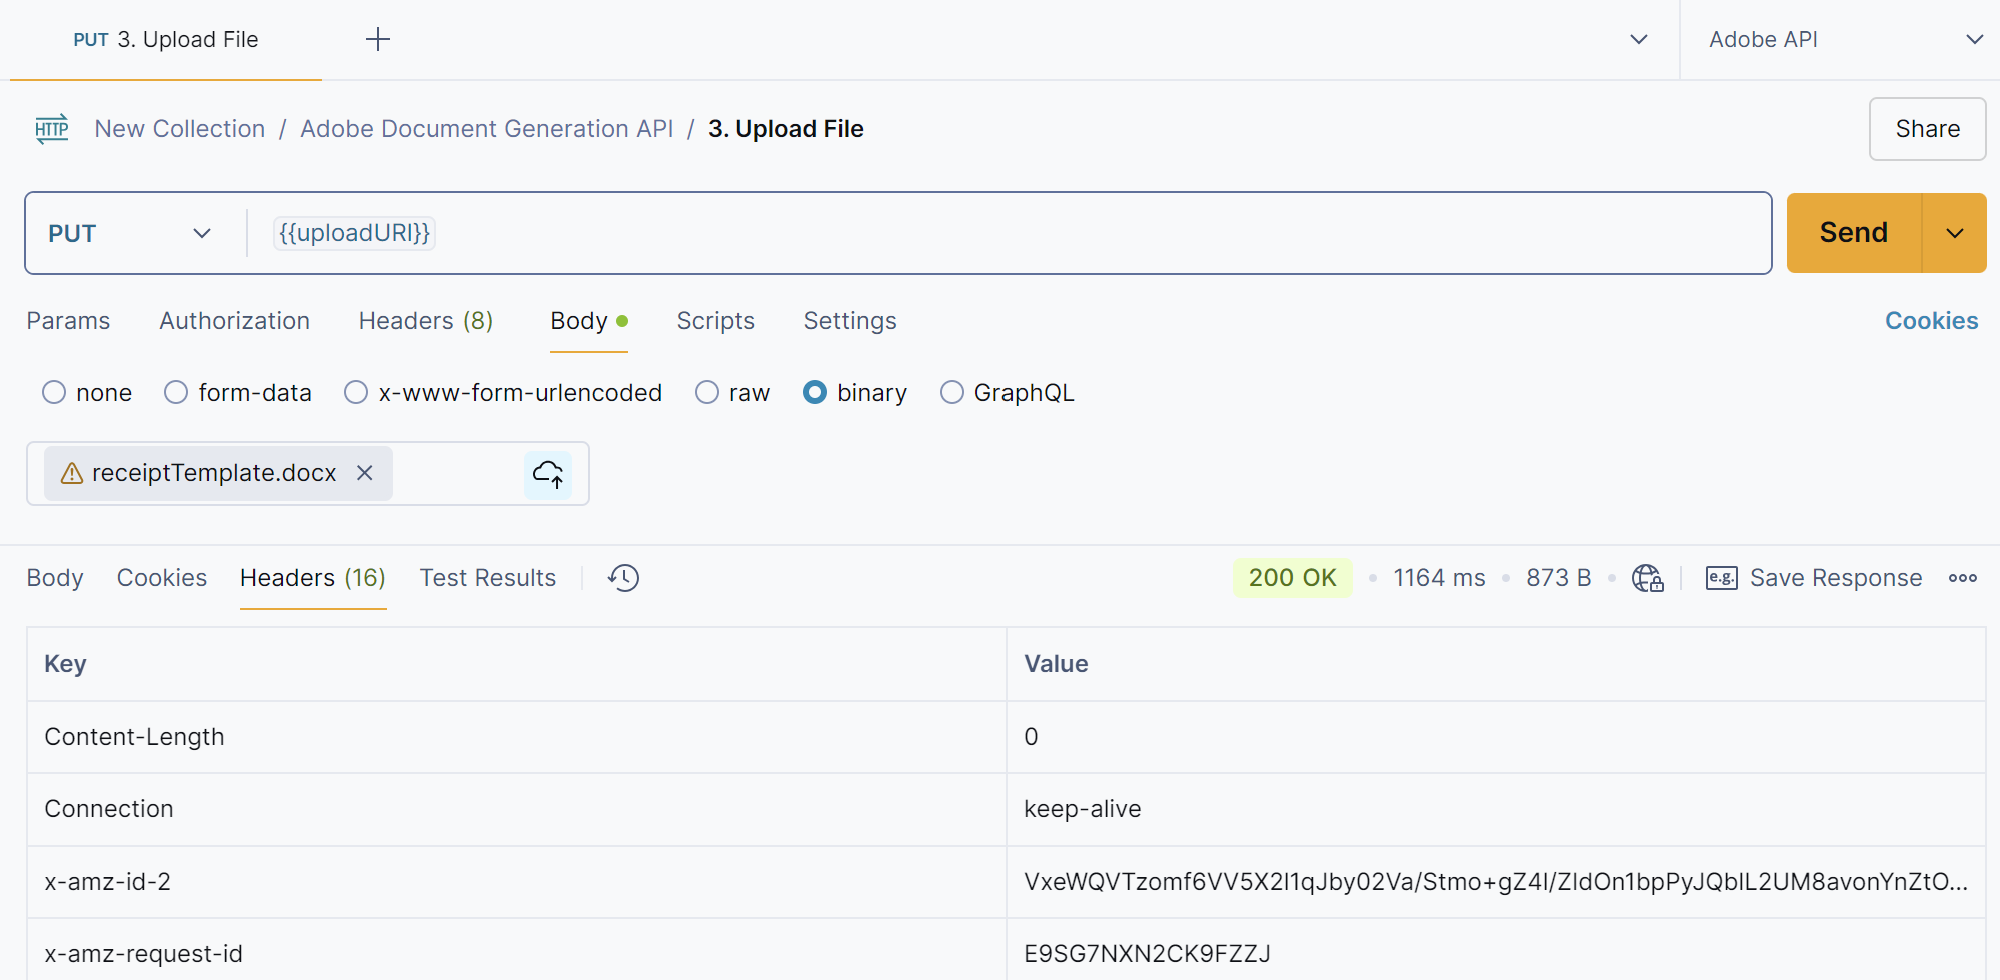 Figure 6: Uploading the file to Adobe’s cloud storage using Postman.
7. Document Generation (DOCX or PDF)
Submit a document generation job to Adobe’s API, specifying the desired format (DOCX or PDF) and providing the JSON data for merge.
Endpoint: https://pdf-services.adobe.io/operation/documentgeneration
Request:
- Method:
POST - Headers:
Authorization:Bearer <ACCESS_TOKEN>Content-Type:application/json
-
Body (Raw JSON):
{
  "assetID": "",
  "outputFormat": "docx", // Change to "pdf" if you want a PDF
  "jsonDataForMerge": {
    "author": "Gary Lee",
    "Company": {
      "Name": "Projected",
      "Address": "19718 Mandrake Way",
      "PhoneNumber": "+1-100000098"
    }
  }
}
Response:
- Status: 201 Created
- Headers:
x-request-id:<JOB_ID>
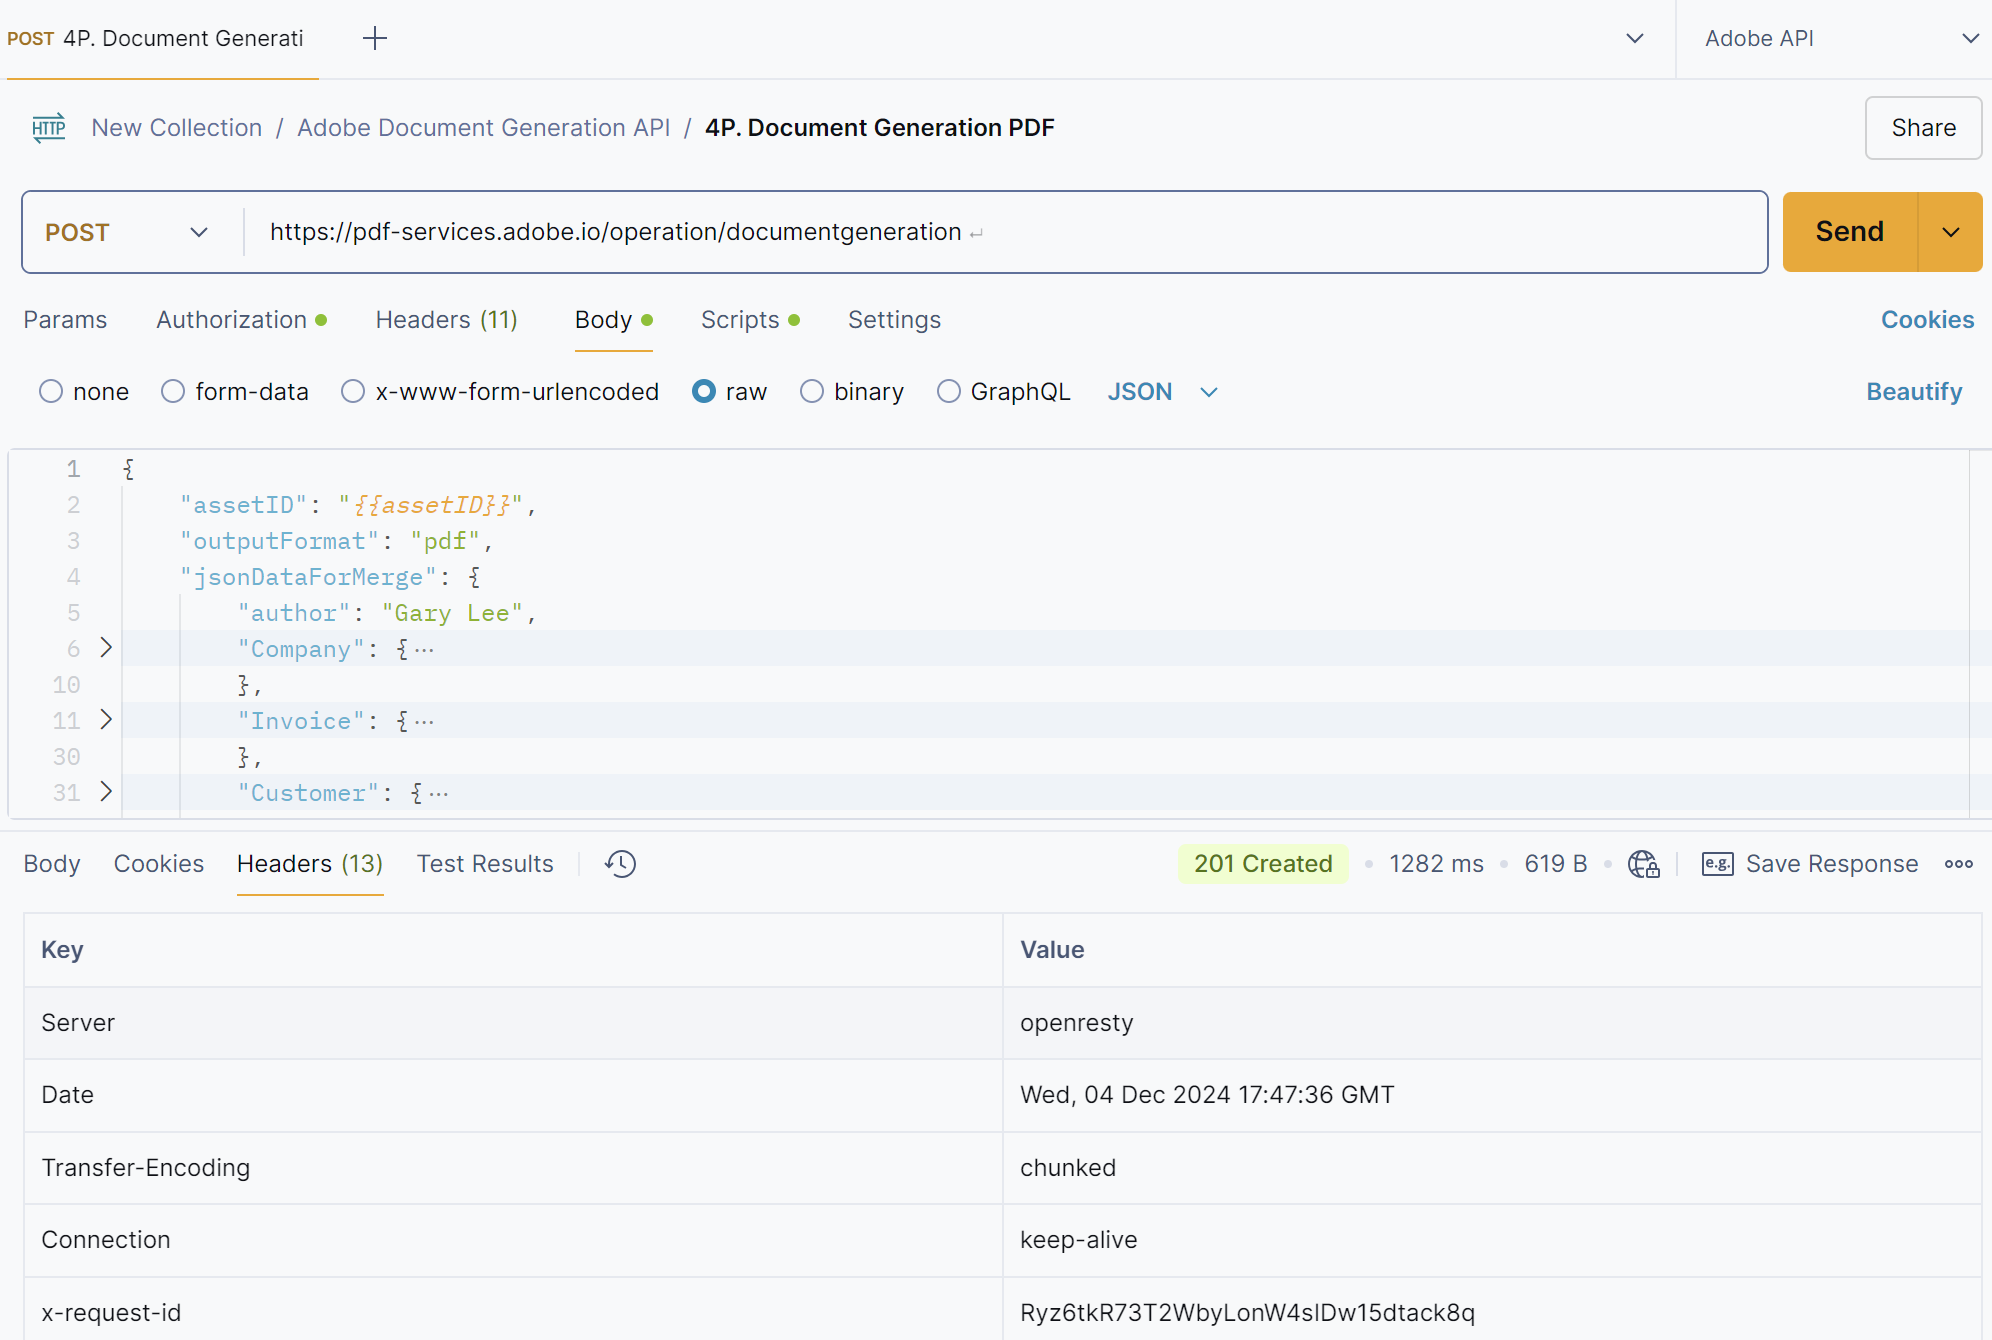
Figure 7: Sending a document generation request using Postman.
8. Poll the Document Generation Periodically check the status of your document generation job using Adobe’s API until it’s completed
Endpoint: https://pdf-services-ue1.adobe.io/operation/documentgeneration//status
Request:
- Method:
GET - Headers:
Authorization:Bearer <ACCESS_TOKEN>x-api-key:<YOUR_CLIENT_ID>
Response:
-
Status: 200 OK
{
  "status": "done/in progress",
  "asset": {
    "metadata": {
      "type": "application/vnd.openxmlformats-officedocument.  wordprocessingml.document",
      "size": 580360
    },
    "downloadUri": "<DOWNLOAD_URI>",
    "assetID": "urn:aaid:AS:UE1:08b0c24c-90ad-4ab0-aec3-291bfd421abf"
  }
}
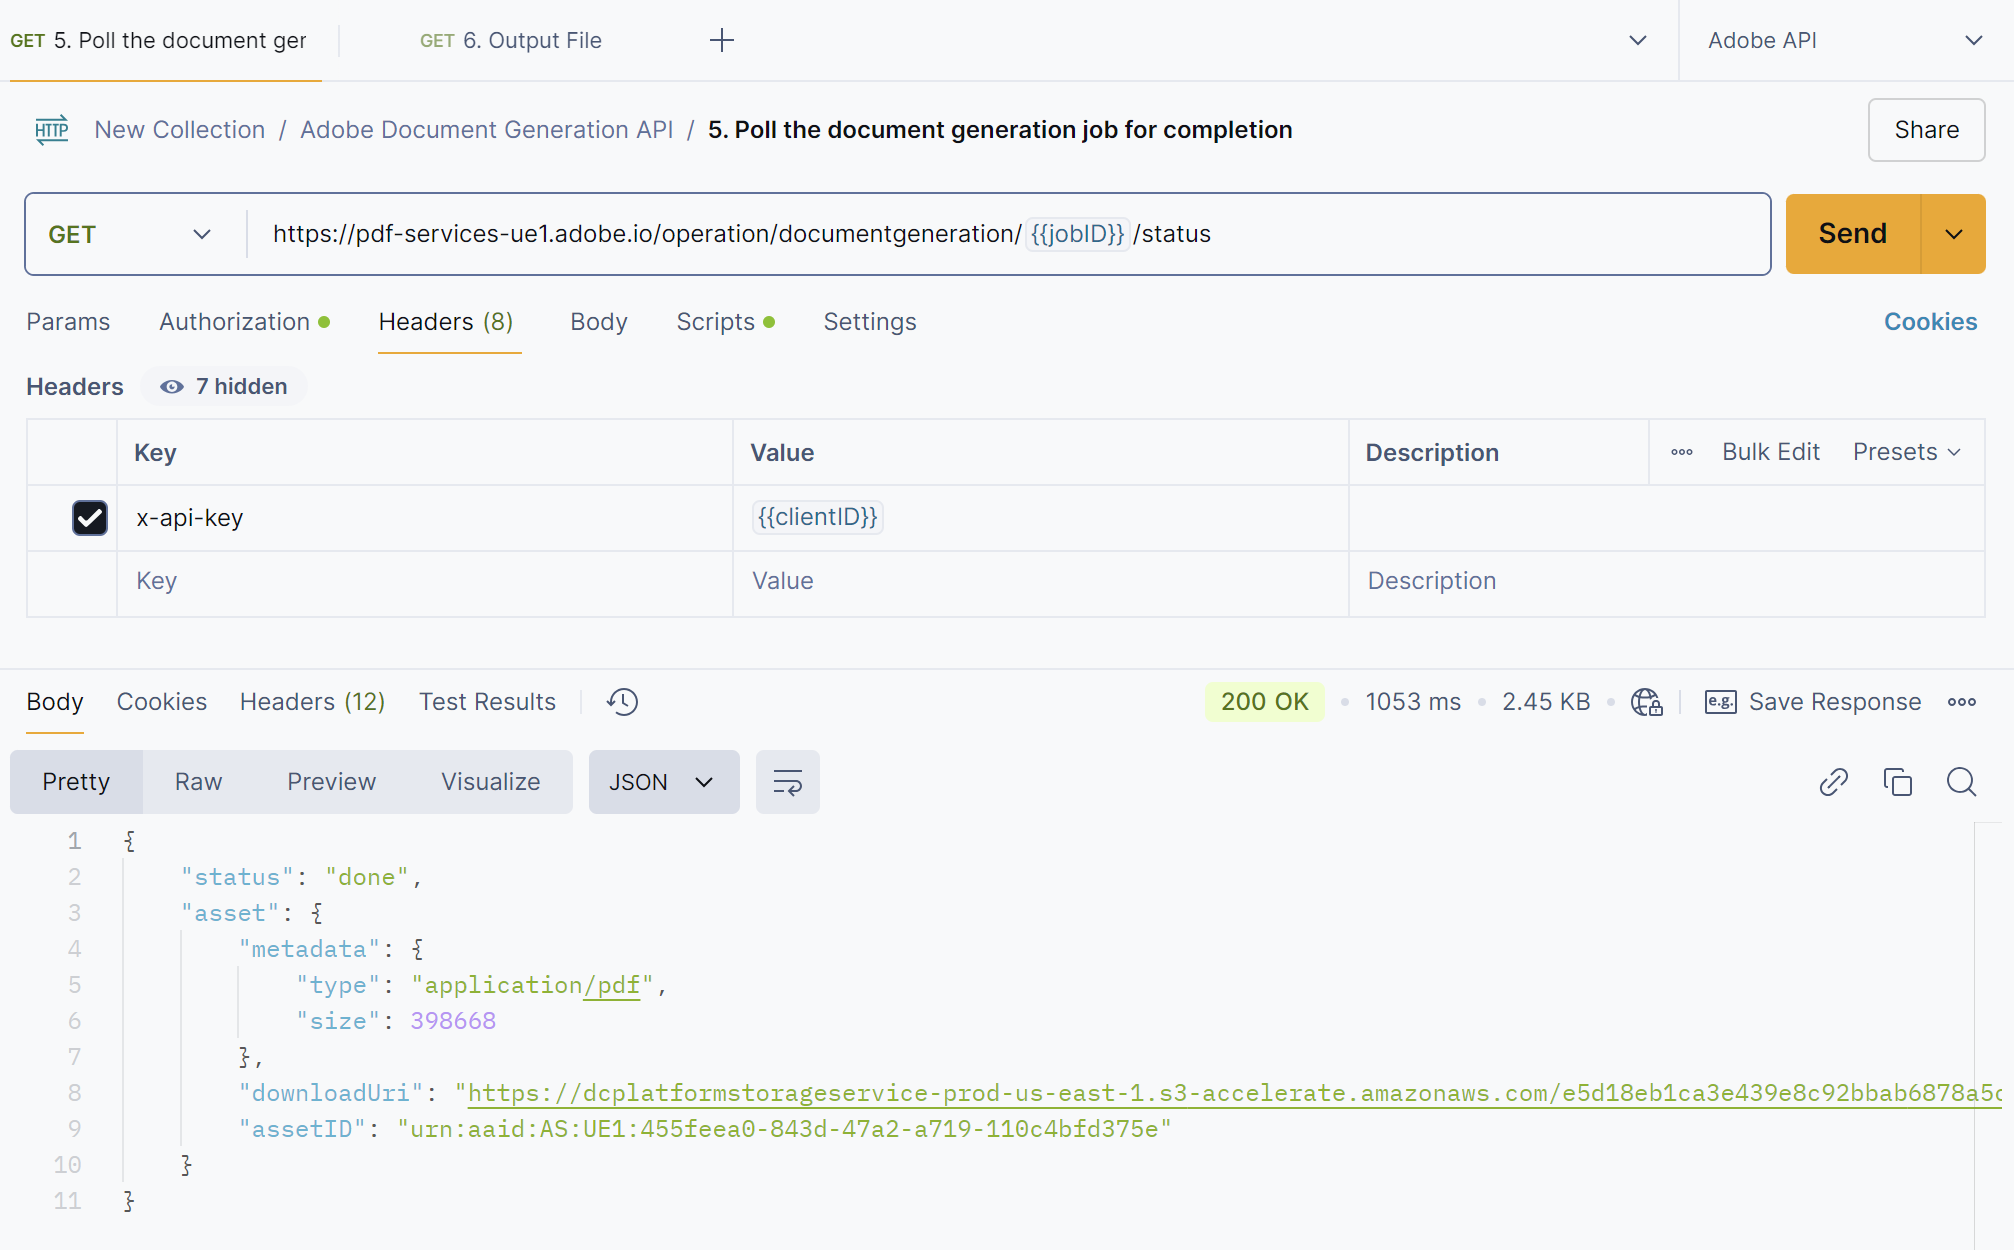
Figure 8: Polling the status of document generation using Postman.
9. Get the Output File
Once the document generation is complete, download the output file from Adobe’s cloud storage.
Endpoint: <DOWNLOAD_URI>
Request:
- Method:
GET
Response:
- The response will contain the output file content in the specified format (DOCX or PDF).
Example:
GET <DOWNLOAD_URI> HTTP/1.1
Host: <DOWNLOAD_URI>
Response:
- Status: 200 OK
- Body: The response will contain the output file content in the specified format (DOCX).
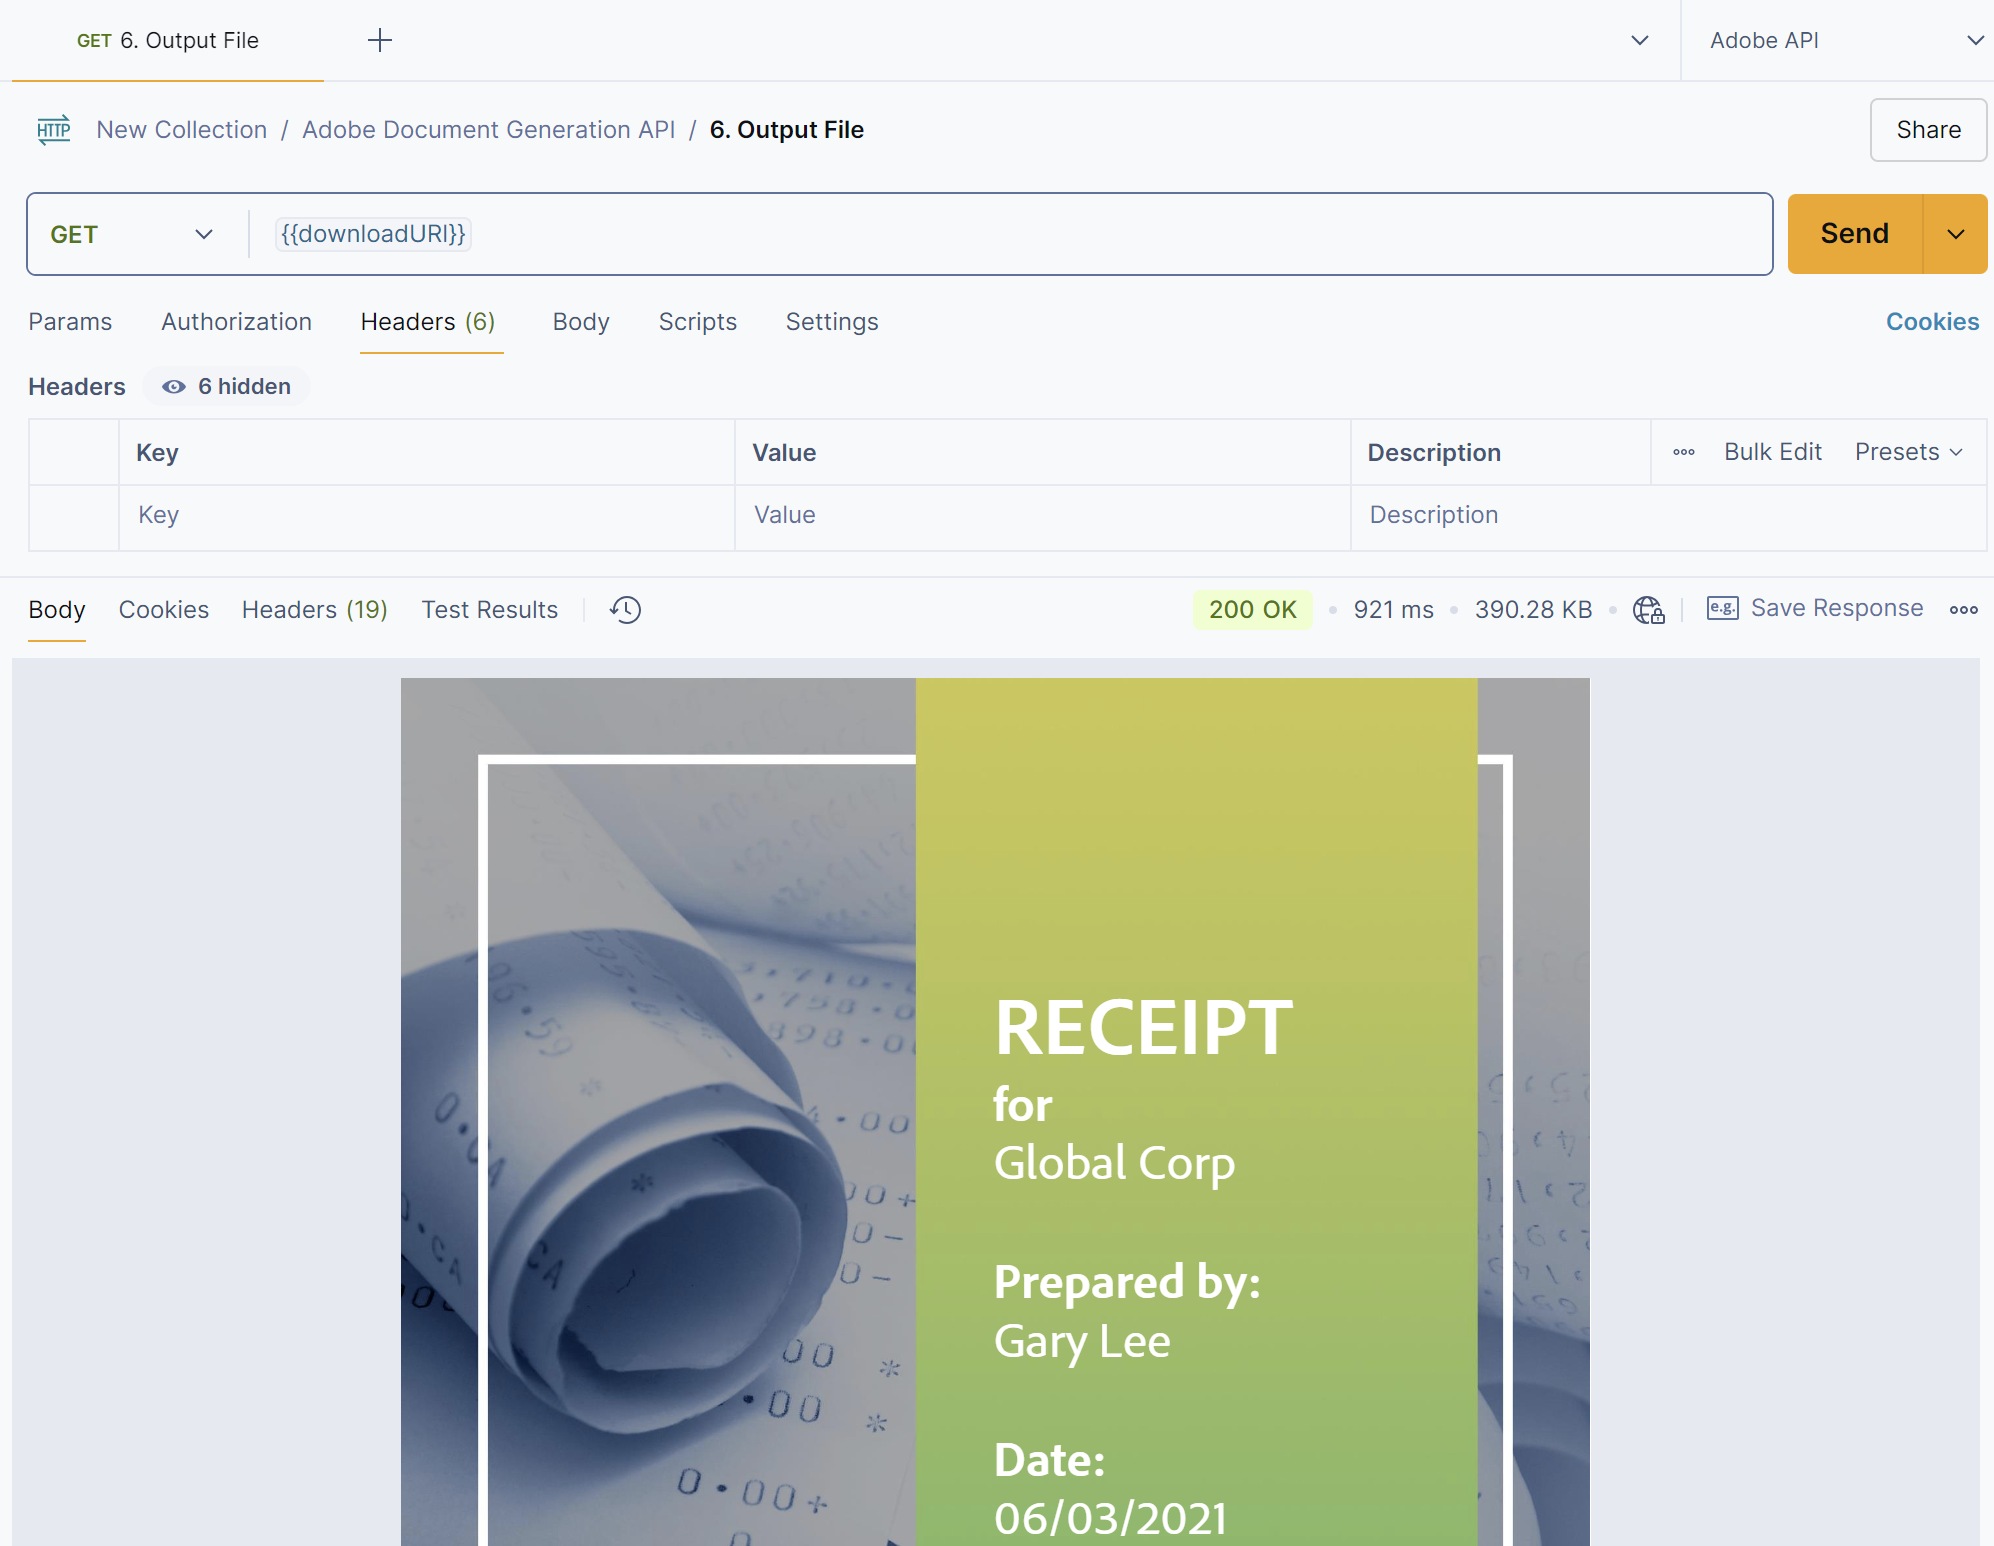
Figure 9: Downloading the generated document using Postman.
Notes:
- Ensure to handle authentication errors and retry logic as per your application needs.
- The key part is the
"format": "docx"or"format": "pdf"line in the request payload. Theoutput_uriyou receive inStep 8will point to the generated file in the specified format. - Refer to Adobe’s official documentation for more detailed instructions and error handling.
This completes the detailed steps for integrating with Adobe Document Services API. 😊📄🚀